PIONEER CDJ-3000
SETUP
Connections
Depending on the amount of CDJ-3000 available units and other connected gear (mixers, other sound-cards etc), make the appropriate connections as described in the Pioneer Club-setup Guide
Firmware & Drivers
Firmware :
Update the firmware of each CDJ-3000 unit to the latest version from https://www.pioneerdj.com/en/support/software/player/cdj-3000/#firmware-update
Drivers :
Windows : Install the Pioneer AUDIO driver from https://www.pioneerdj.com/en/support/software/player/cdj-3000/#drivers
Mac OSX: You don't have to install any driver. Mac OS standard audio driver will be automatically installed when you CDJ is connected to your Mac with a USB cable.
VirtualDJ 8 Setup
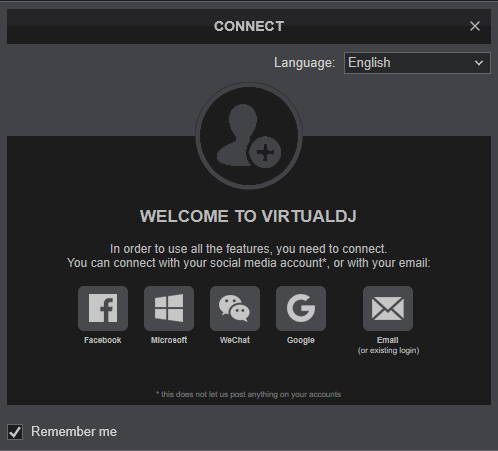
Once VirtualDJ is opened, a Login Window will appear. Login with your virtualdj.com account credentials.
A Pro Infinity or a Pro Subscription License is required to use the Pioneer CDJ-3000 with VirtualDJ. Without any of the above Licenses, the controller will operate for 10 minutes each time you restart VirtualDJ.
http://www.virtualdj.com/buy/index.html
Click on the CDJ-3000 button in case the built-in sound cards of the CDJ-3000 are used and VirtualDJ will automatically apply the necessary Audio configuration. See Pioneer Club-setup Guide for further setup options.
Click OK.
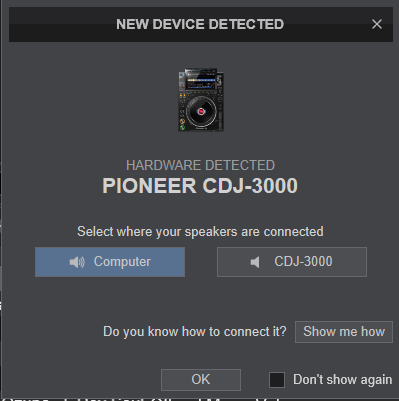
The unit is now ready to operate.
MIDI Operation
The unit should be visible in the CONTROLLERS tab of Config and the “factory default” available/selected from the Mappings drop-down list.
The factory default Mapping offers the functions described in this Manual, however those can be adjusted to your needs via VDJ Script actions.

Note. Each CDJ-3000 unit (if more than 1 is connected) will be additionally displayed in this window, and any modifications in the mapping file will affect all units.
Find more details at http://www.virtualdj.com/wiki/VDJ8script.html
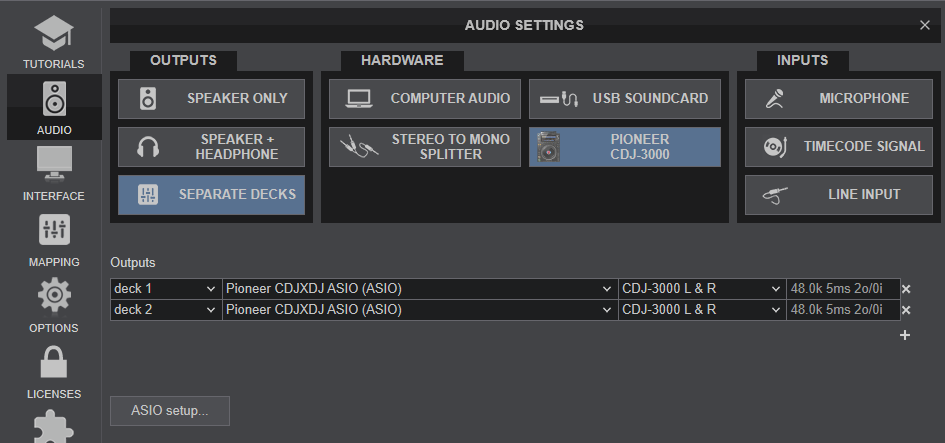
AUDIO Setup
The unit has a pre-defined Audio setup and a special button in the AUDIO tab of Config to provide that. Alternative setups can be applied, depending your setup and the available units. See Advanced setup chapter
Refer to the manual of the unit for further features and setups.
https://www.pioneerdj.com/en/support/documents/player/cdj-3000/
For further VirtualDJ settings and features please refer to the User Guide of VirtualDJ 8.
http://www.virtualdj.com/manuals/virtualdj8/index.html
Controls
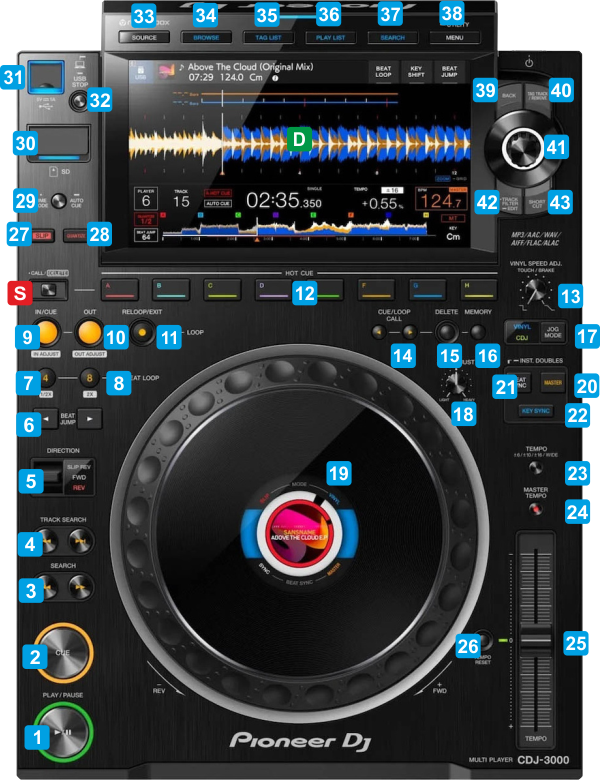
KEY
ACTION
When track is playing, press this button to return to the stored CUE position (or the beginning of the track if no CUE is set.
The LED of this button will blink if the track is paused but current position is not the stored CUE point and lit solid in all other cases.
Press the right >> button to load the next track from the focused Browser list.
In both cases, the playing status (playing or stopped) will be kept.
Move and hold the latch to the upper position to play the track in reverse while held. When released, track will resume to the position it would have been if never reversed.
Hold SHIFT down and then use these buttons to decrease/increase the amount of the beats for beatjump. The size will be shown on the CDJ-3000 screen
When in loop, use this button to enable/disable Loop In Adjust mode (LED will blink fast) and then use the jogwheel to fine-adjust the entry point of the Loop.
When in loop, use this button to enable/disable Loop Out Adjust mode (LED will blink fast) and then use the jogwheel to fine-adjust the exit point of the Loop.
Use these 8 buttons to assign or trigger Hotcues 1 to 8. When a Hotcue is not assigned, use the button to set a Hotcue at the current track position. When assigned, buttons will jump track to their set position.
Hold SHIFT and then use these buttons to delete their assigned Hotcues.
In Stems mode : First 4 buttons control Stems. Buttons 5 to 8 control Stems FX.
In Sampler mode : Trigger Samples 1 to 8.
Hold SHIFT down and then use these buttons to set the Hotcue buttons to Full (PREVIOUS button) or Split (NEXT button) mode (when in Stems or Sampler mode).
Hold SHIFT down and then use this button to cycle through Hotcues, Stems and Sampler mode for the HOTCUE buttons
When VINYL mode is enabled, use the upper/inner part of the wheel to scratch the track backwards/forward and the outer part (side) to pitch-bend (temporary speed-up/slow-down tempo)
When CDJ mode is enabled use any part of the jogwheel to pitch-bend (temporary speed-up/slow-down tempo)
See LOOP controls for loop in/out adjust.
The small LCD screen will display the Album Art of the loaded track, the CUE position and a track rotation marker
When in Browser view :
Use the rotary to scroll through files or folders.
Push the rotary to see the tracks of the selected folder (if in Folders view) or load the selected track to the Deck (if in Tracks list view)
DISPLAY
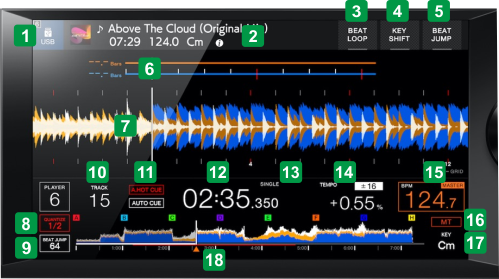
DISPLAY
ACTION/INFO
The Phase/Wave graphics are not available in USB Control mode
DISPLAY SETTINGS
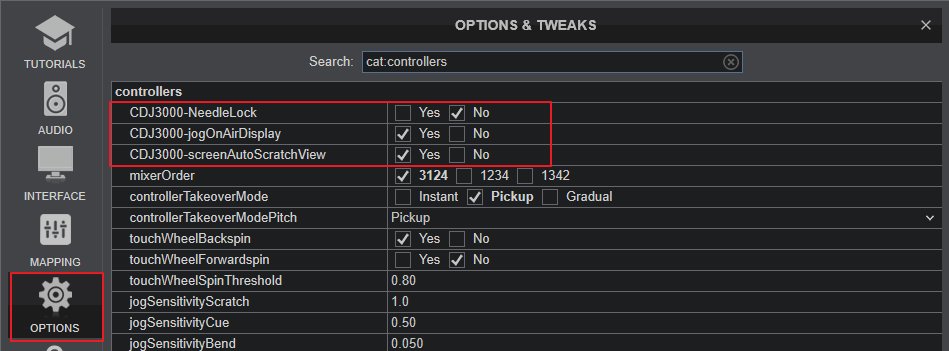
A few settings are available in VirtualDJ->Settings->OPTIONS tab->Controller sub-category.
- NeedleLock : When set Yes, touching the Progress wave on the Display will not have move the track if the Deck is audible
- jogOnairDisplay : When set to Yes, the ring of the CDJ-3000 platter will change color if the Deck is audible.
- screenAutoScratchview : When enabled the screen view will automatically change to the Decks (Scratch) view when a new track is loaded from the Browser view
